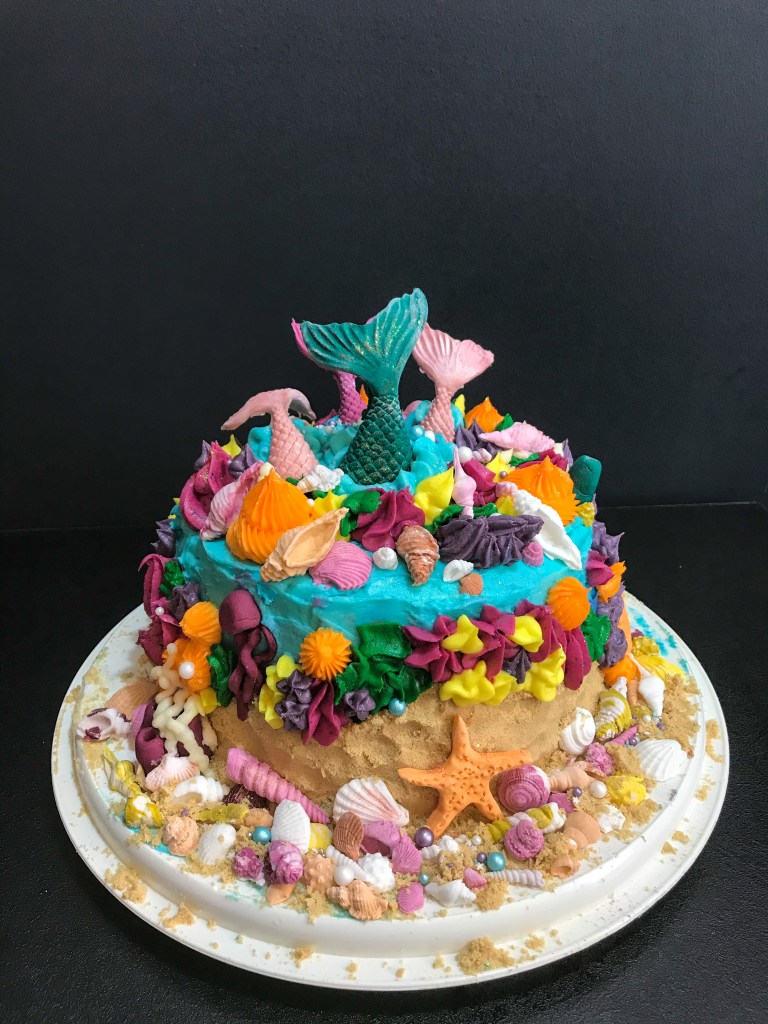
I made this cake for my 28th birthday. Yes, I made my own cake and I made it mermaid-themed. No regrets. If you’ve been looking for a mermaid themed birthday cake, feel free to read on for some inspiration.
For this recipe, you will need:
- 1 pre-made triple-layer Victoria Sponge (Use the ratio: 10 oz butter, 10 oz caster sugar, 10 oz plain flour, 5 eggs, 2 tsp baking powder, 2 tsp vanilla extract, pinch of salt. Fill with buttercream [use the ratio suggested below] and jam.)
- Modelling and Flower Paste
- Corn flour
- Paint brush
- Powdered food dyes of various shades
- Edible glitter
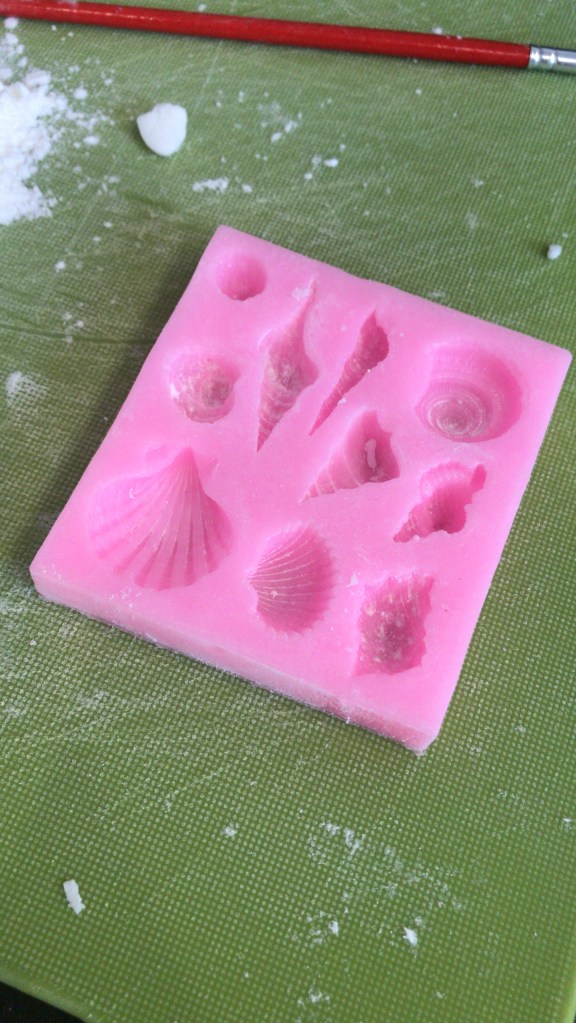
- Silicone shell mould
- Silicone mermaid tail mould
- 2 x batches of buttercream (see below)
- 1 packet of butter biscuits
For this cake, I did a triple-layer basic Victoria Sponge recipe and focused on the decoration on the outside. Before you do anything to your Victoria Sponge, put it on your desired cake board and cover the sponge cake in a thin layer of buttercream and chill until the icing is hard. This helps the outside icing adhere to the cake and eliminates the risk of crumbs mixing with your icing.
The icing
The entire cake is covered in buttercream (apart from the sugar paste shapes). Here’s the recipe that I always stand by. It’s pretty standard and reliable. Whatever amount you want to make, just think ‘half the amount of butter to icing sugar’. You want to make two batches of this: one for the coating and one for piping the coral decorations.
- 800 g icing sugar
- 400 g soft, unsalted butter
- 1 tsp vanilla extract
- Milk to loosen up
- Food colouring powders
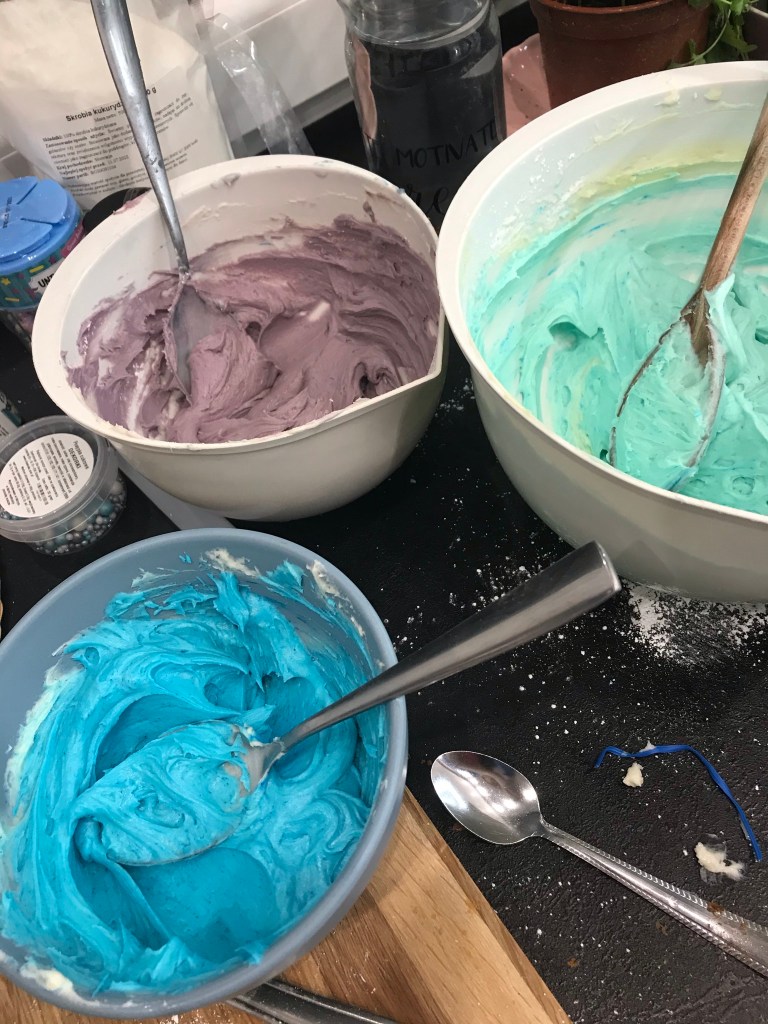
- With an electric whisk, beat the butter and vanilla extract together until the butter is well softened. Then sieve in a bit of icing sugar at a time and whisk after each addition. Trust me on this. Otherwise, you’ll have a kitchen covered in snow in no time. If the buttercream becomes too stiff, add a dash of milk as you go.
- Divide the buttercream into three smaller bowls.
- Then colour one bowl a pale blue, another bowl a darker blue, and the last bowl a pastel purple.
- Spread these colours randomly onto your cake. I started with dark blue at the bottom and added the lighter blue towards the top of the cake. I swooshed in the purple in the middle. There is no wrong way to ice your cake here. Reserve some blue icing for decorating later (a few tablespoons).
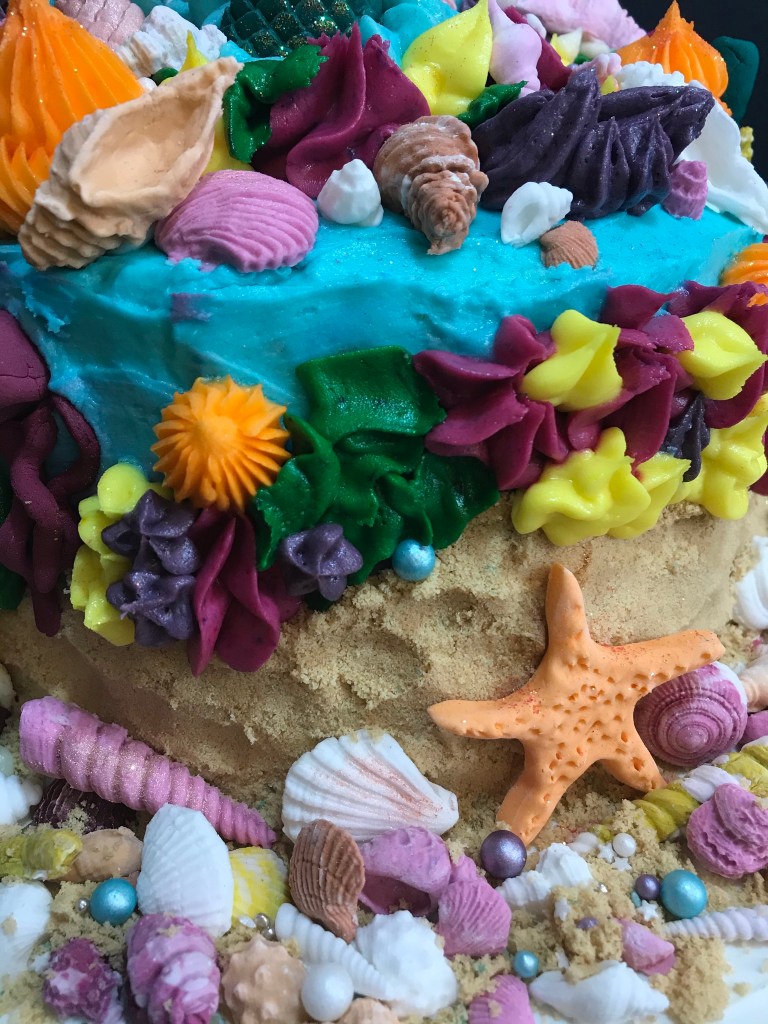
Edible sand
For edible sand, simply buy a packet of butter biscuits (approx. 300g), empty the biscuits into a freezer bag and crush with a rolling pin. Alternatively, grind in a spice grinder. Bash or grind until a lovely sand consistency is achieved. Place the biscuit crumbs into a large dish.
Adding the sand to the cake
Now you’ve covered your cake in the ocean-themed icing, take your dish of biscuit crumbs and place next to your cake, grab a fistful of ‘sand’ and carefully pat it onto the side of your cake—there will be some sand that just doesn’t stick to the cake and that is fine. Keep going around the cake until your ocean has a sandy bottom.
Make the shells and mermaid tails
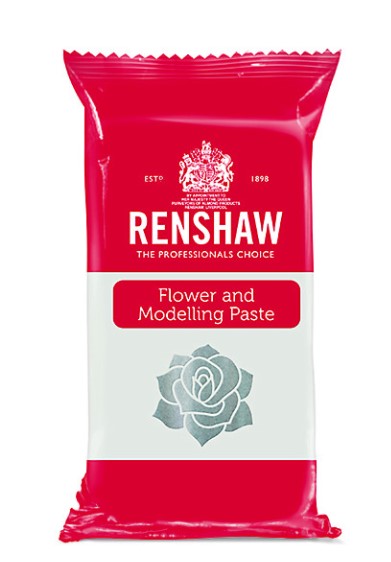
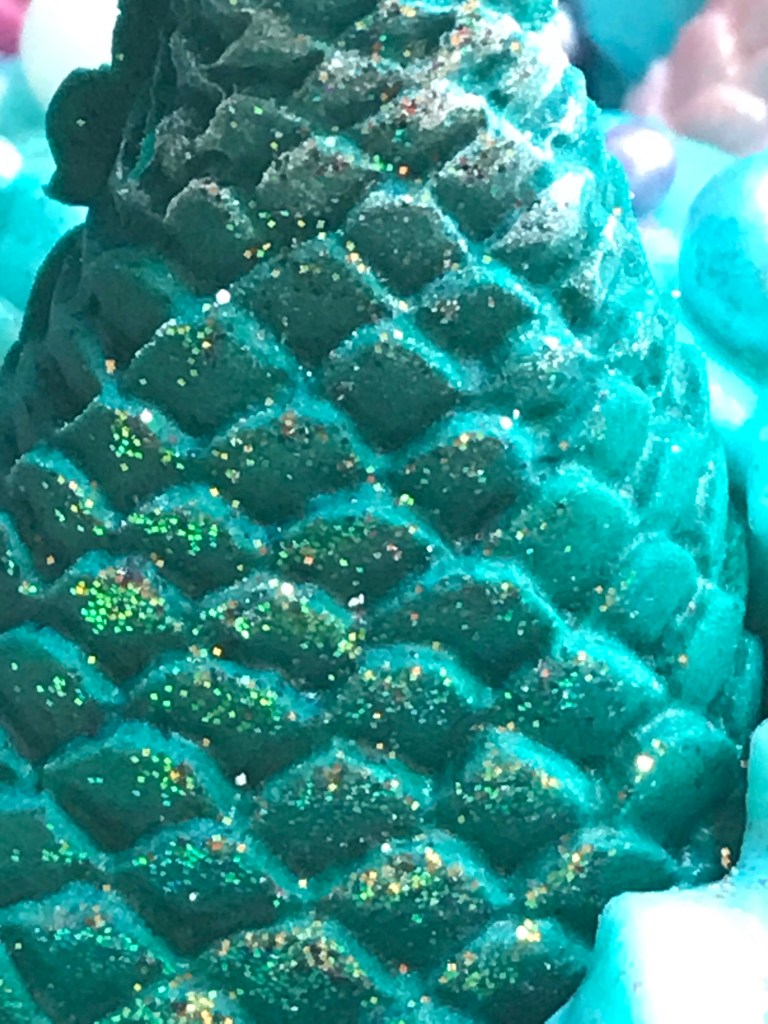
I used Renshaw Flower and Modelling Paste to make the shapes on my mermaid cake along with the above silicone mould. I also used a mermaid tail mould made of the same material.
I’ll admit that I was sceptical about the moulds and whether the mermaid tails would stay intact. But I’m pleased to tell you that everything went really well!
Here’s an example you could purchase for this: https://www.amazon.co.uk/Silicone-Seashell-Seahorse-Starfish-Chocolate/dp/B08RD9WD5L/ref=sr_1_5?dchild=1&keywords=mermaid+mould&qid=1619520825&sr=8-5.
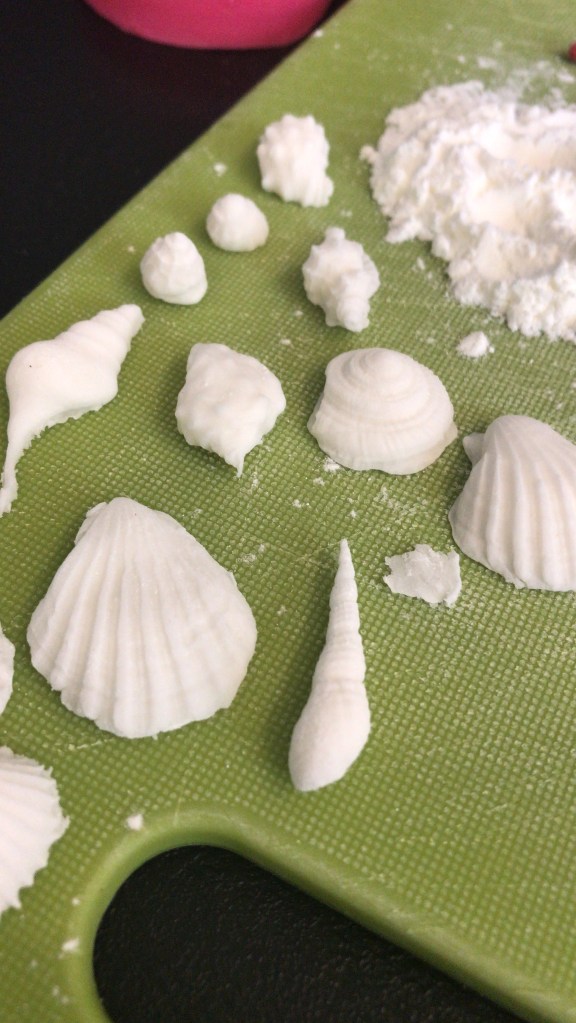
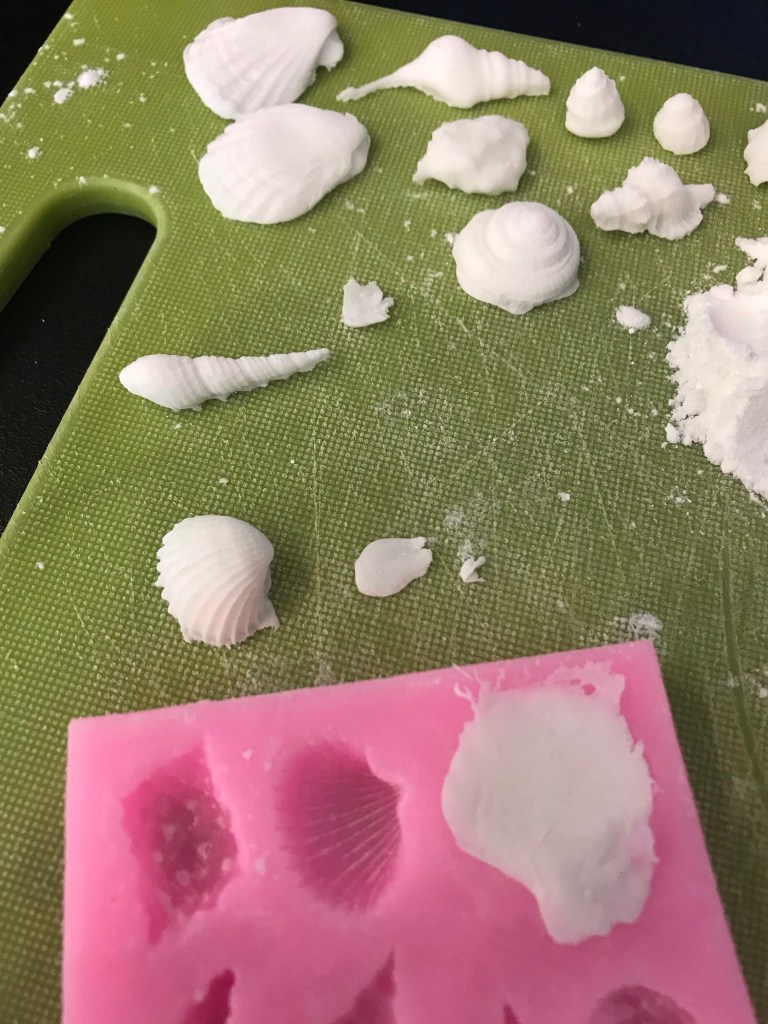
To mould modelling paste shells, all you have to do is brush a bit of corn flour inside the shell mould with a small (unused) paint brush. Tap out the excess or blow it out and you’re good to go. For the mermaid tails, I also sprinkled in some glitter into the mould BEFORE I added the paste. Next, cut off an appropriate amount of modelling paste, roll it in your hands to make sure it’s pliable and press it firmly into the shape you want to make. Make it as flat as possible, but if you’ve added too much paste for the shape you’re going for, simply slice the excess off with a knife. This might pull some of the paste away from the sides, so push the paste back into the edges as necessary.
Leave the shape to dry for a minute or two (in the time it takes to fill other shapes in the mould tray), and flip the silicone mould over and carefully push the shapes out.
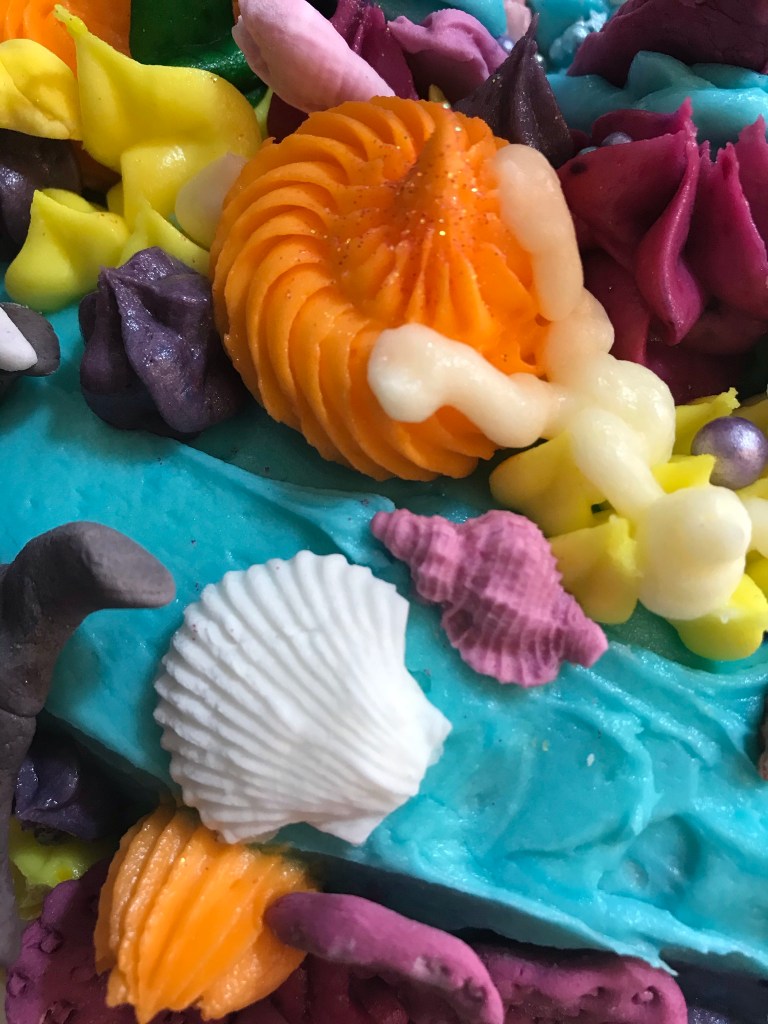
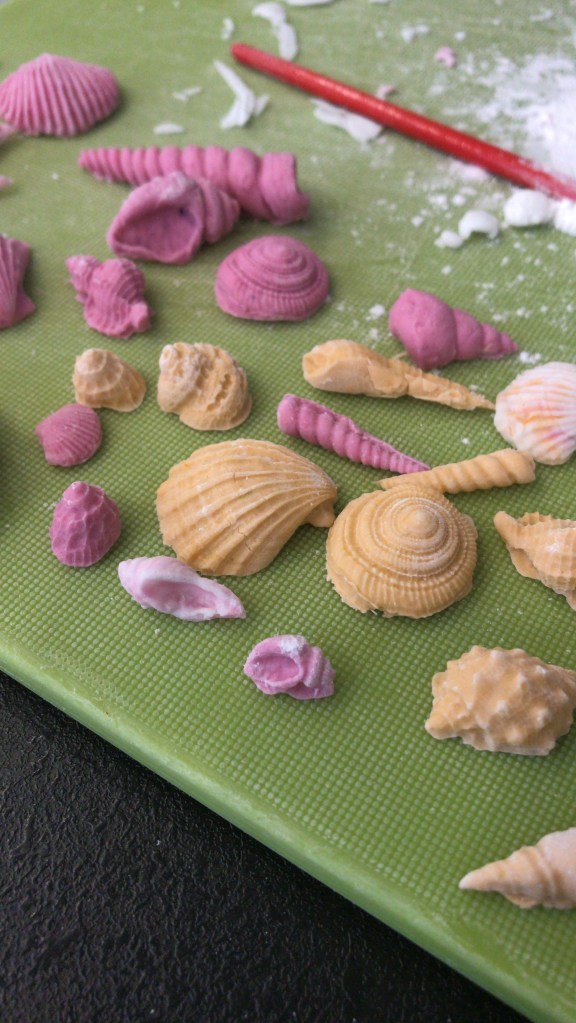
As you can see below, I coloured a lot of the shells. I used natural powdered food colouring tints that are uber powerful—I found that pinks, browns, yellows and oranges looked the most natural. Experiment with what you have in your baking cupboard and create some beautiful shells! Don’t shy away from making other sea-themed shapes like fish, seahorses, crabs …
Decorating the cake
Make another batch of buttercream—this time half the above recipe (200 g butter / 400 g icing sugar). You’ll want a few bowls free for this one because you’ll be creating all kinds of colours! I went for pink, orange, bright green, yellow, and purple.
Get your piping nozzles out and choose your favourite shapes. The more varied your nozzle tips are, the more diverse your coral will look.
Divide all your icings into your bowls and colour them however you like. Spoon each portion of icing into its own piping bag with your chosen tip for that colour.
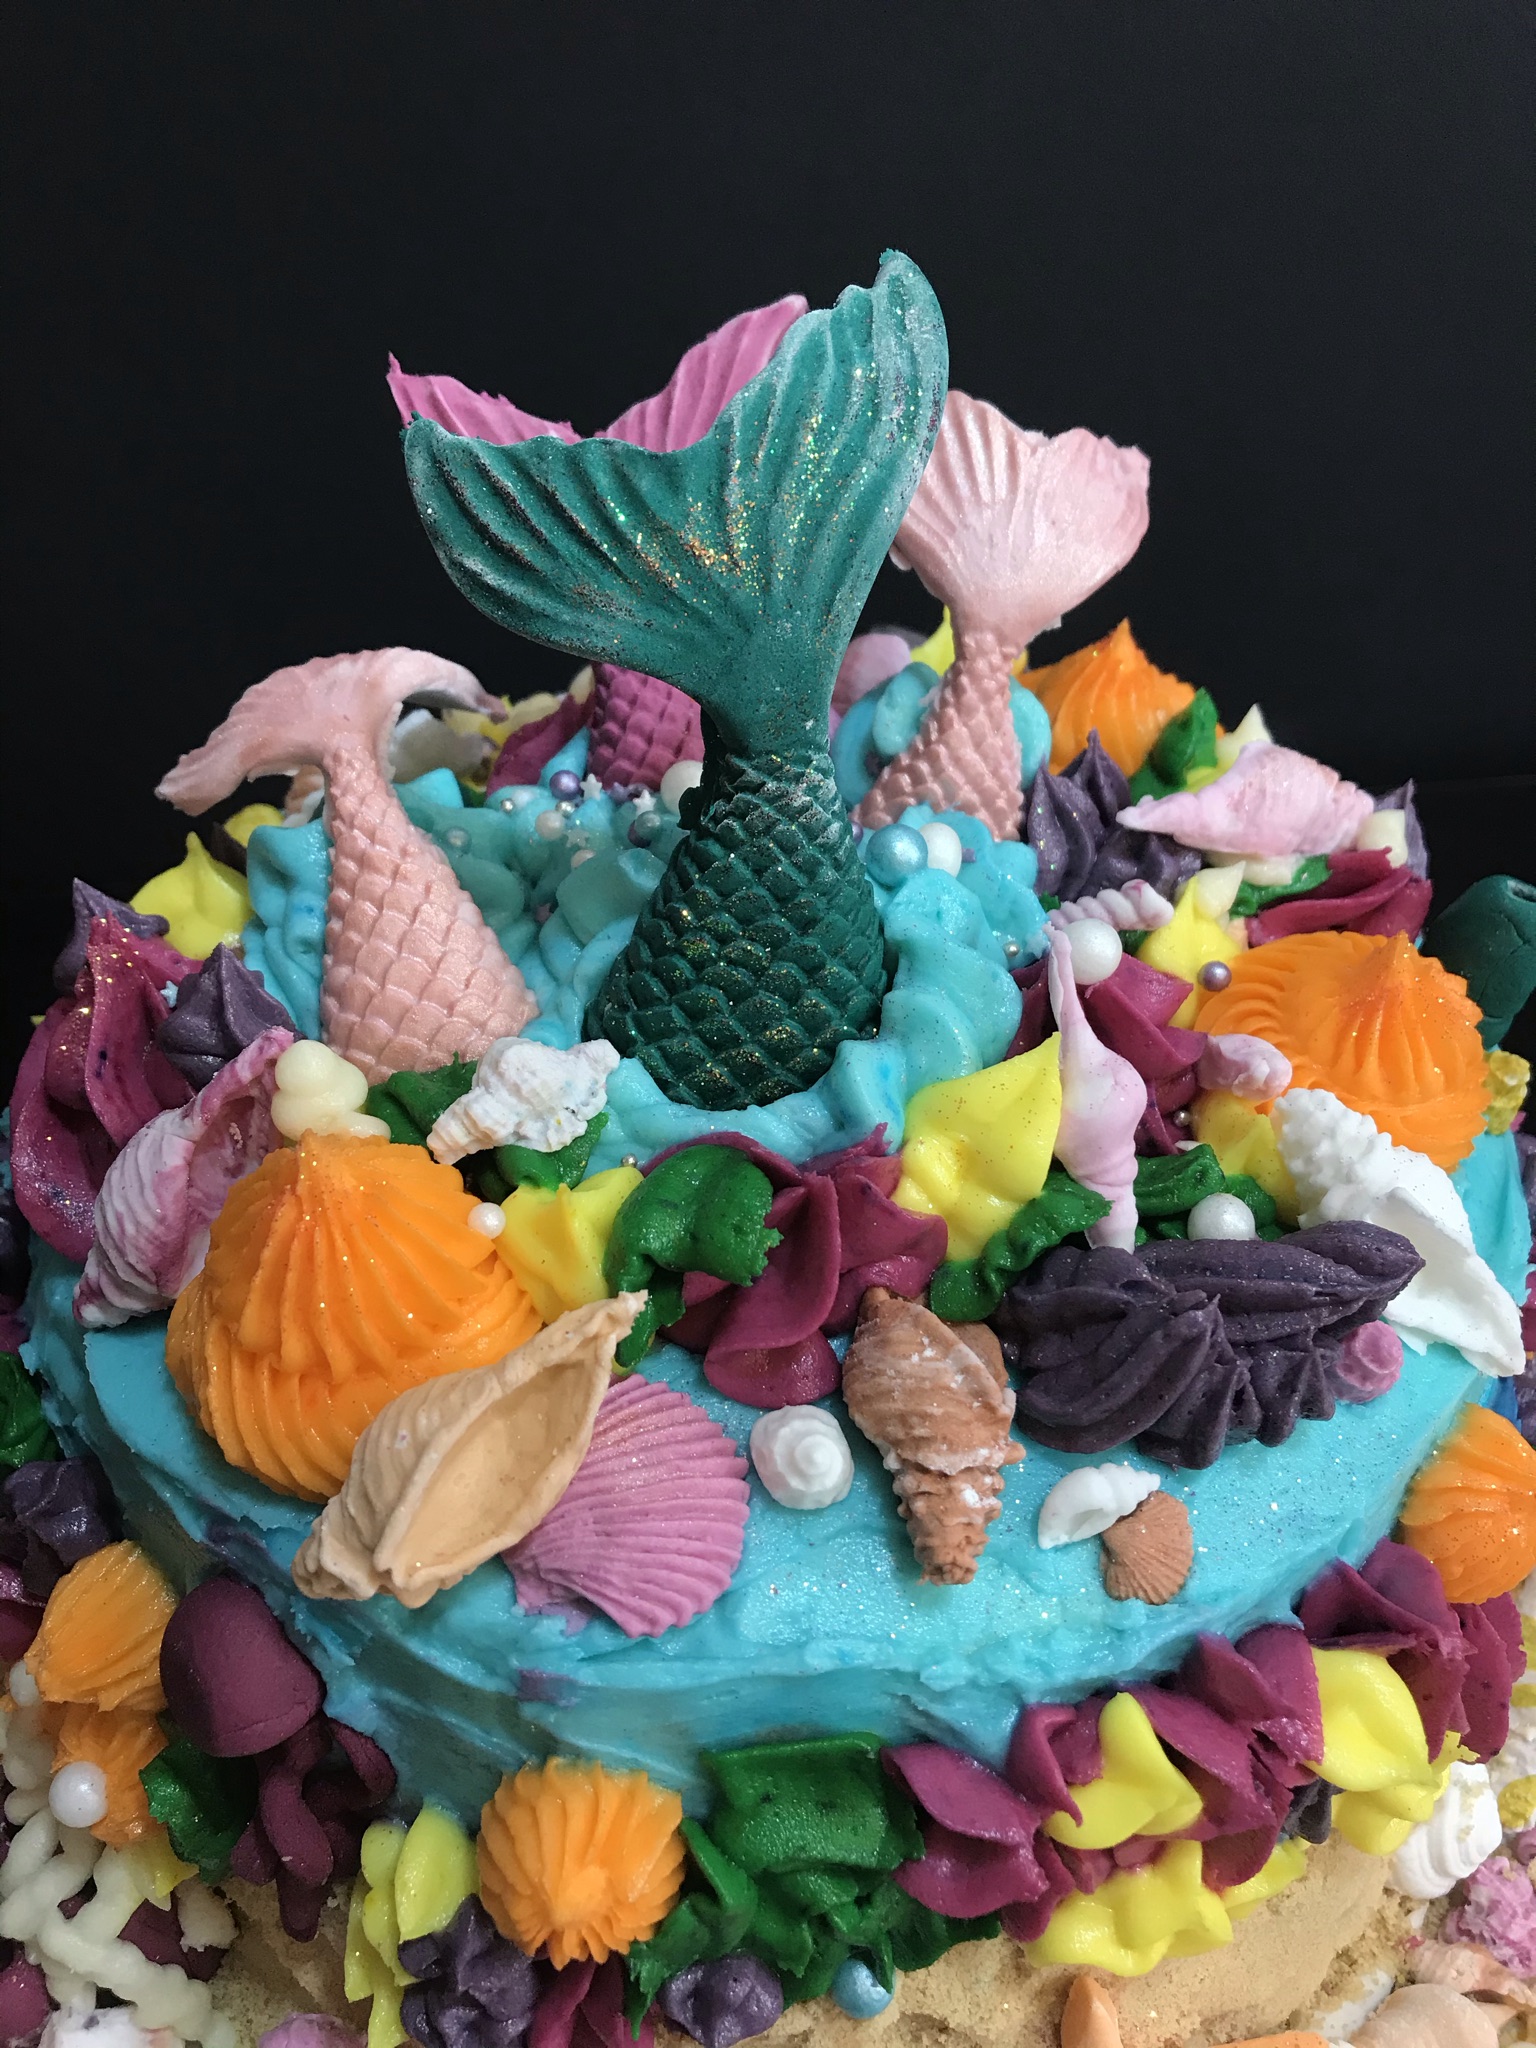
Now, it’s time to let your imagination run wild. Get a picture of a coral reef up on your phone for inspiration and get piping! My one suggestion would be to stick any shells that you want to place within the coral immediately after you’ve piped the buttercream before it goes too hard. Continue swirling on your edible coral and adding your edible shells. You can also get mermaid-themed sugar decorations too. Go crazy; this cake is anything but simple.
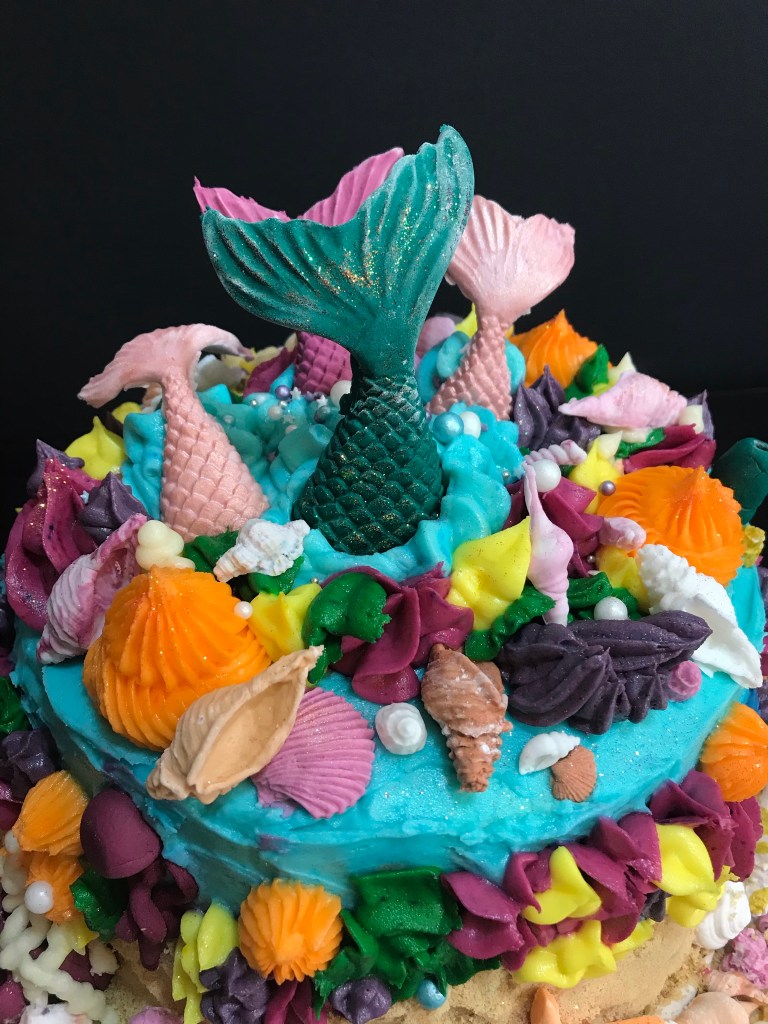
Decorate the sides and the edges of the top of the cake with your coral colours. Next, get the remaining blue icing and put it into another piping bag with a star nozzle. Create a few swirls of blue sea in the centre of the top of the cake. Slide your mermaid tails into the blue swirls. Don’t forget to scatter any remaining shells around the edge of your board to create the illusion of a never-ending ocean floor.
When you’re happy with your design, sprinkle your cake with an obligatory dusting of edible glitter.
I hope this post has given you some inspiration for your mermaid/under-the-sea cake. Let me know if you make one too!